Easy Ink Blending Shape cards | SSS Just Because Word Mix 2
- Preeti

- Mar 6, 2020
- 4 min read

Hello beautiful people,
I have two very easy ink blended shape cards. The focus is the sentiment stamp from SSS called Just Because Word Mix 2. This is a large stamp set, with a coordinating die which makes it very easy to mass produce sentiments. You can stamp all of them together and die cut them and save for whenever you make a card. I don't have the die yet so I just used my paper trimmer to do the job. I love the look of ink blended panels with vibrant colors and using distress Oxide inks make it super easy. Whenever I do ink blending, I almost always use bristol smooth paper, this makes the color blending really easy.


Click on the arrow to the right to see multiple images
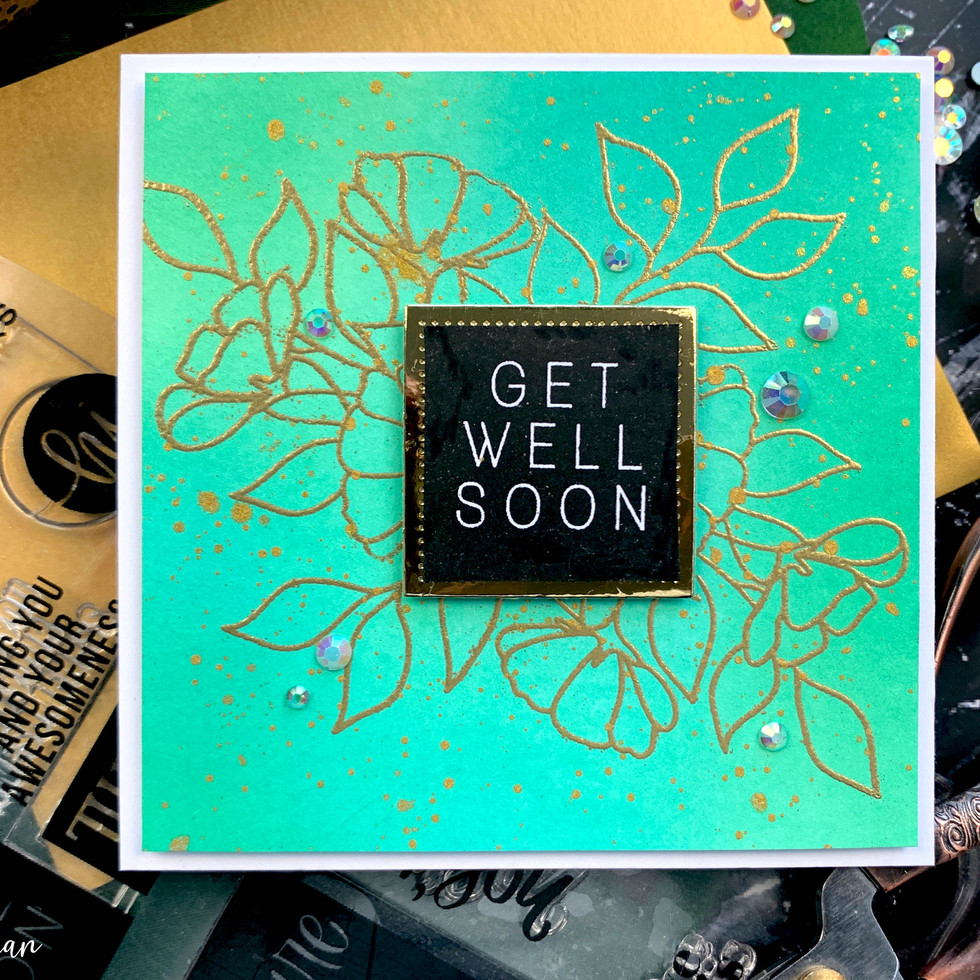
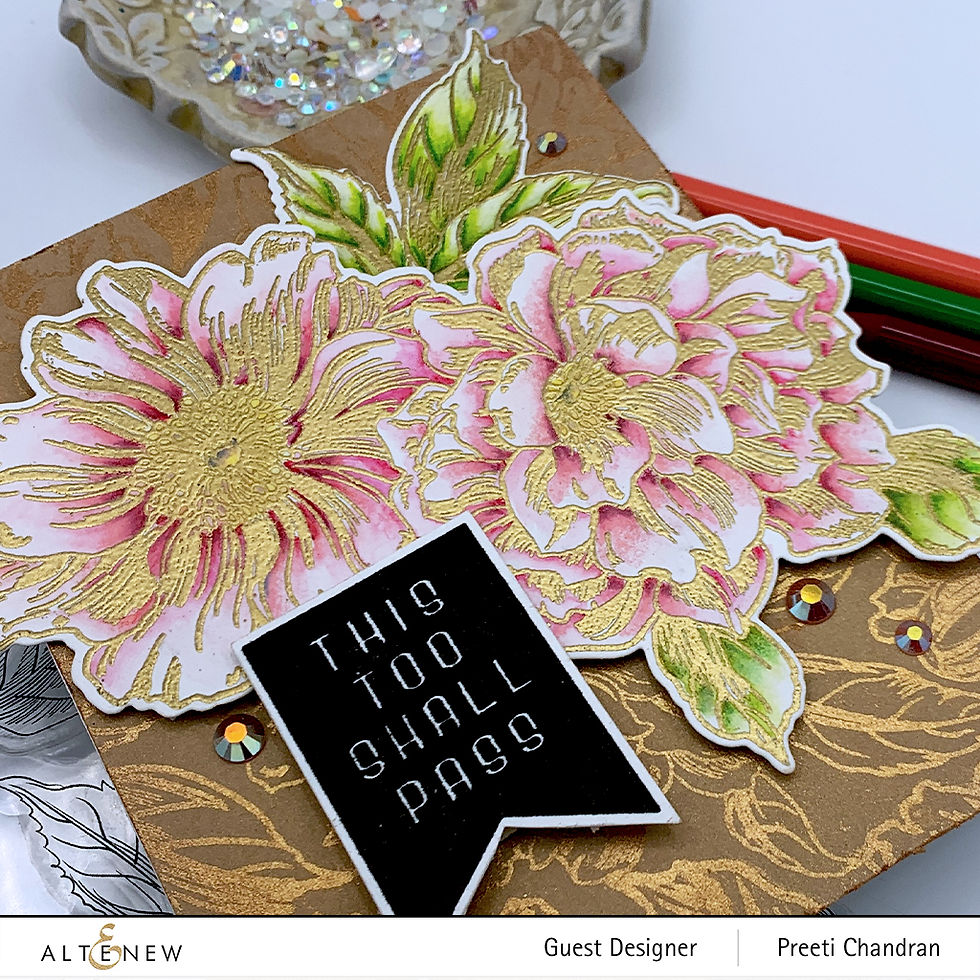
Card 1:
Start by blending Peacock Feathers, Lucky Clover and Cracked Pistachio on a 4x4 bristol smooth card stock using blending brushes. When blending start with he lightest shade and add the darker colors over it, doing this avoids any harsh edges that a brush may create while using a darker ink. The lightest color makes it easy for the darker inks to move on the surface easily. Splatter diluted gold paint all over the ink blended panel..
Heat set the ink blended panel so it is dry. This is important for the next step as we are going to heat emboss our images and we don't want the embossing powder to stick to the panel. Create a mask using SSS Stitched Square Wafer dies, I chose a square that was a little bigger then the square sentiment that I used. Adhere the mask to the center of the blended panel and arrange the floral and the leaf images from SSS Stronger Together stamp set from the center of the card panel. Stamp them using SSS embossing ink and SSS fine Detail Gold embossing powder. Remove the mask when finished heat setting.
Stamp the sentiment Get Well Soon from the SSS Just Because Word Mix 2 stamp set in black on a white card stock. Cut the sentiment into a square using a paper trimmer, making sure you are cutting close to the black edge. What I mean by that is do not leave a white border around the stamped sentiment.
Die cut a square on a Mirror Gold card stock using SSS Stitched Square Wafer Die and adhere the sentiment label on it using foam adhesive. Add foam adhesive to the back of the gold cardstock and adhere it to the center of the blended and stamped panel where we had masked a square earlier. Add a few clear gemstones and adhere this panel using foam adhesive on to a top folding 41/4x41/4 White Square note card.


click on the arrow to the right to see multiple images
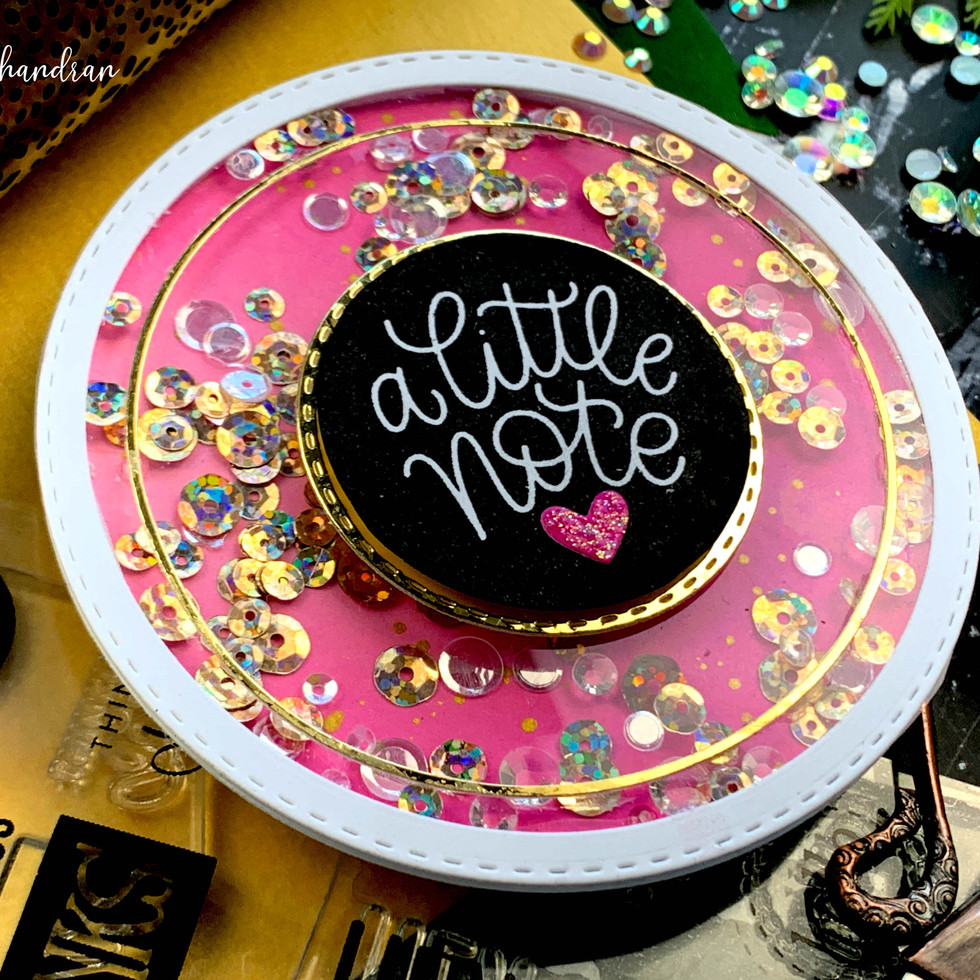
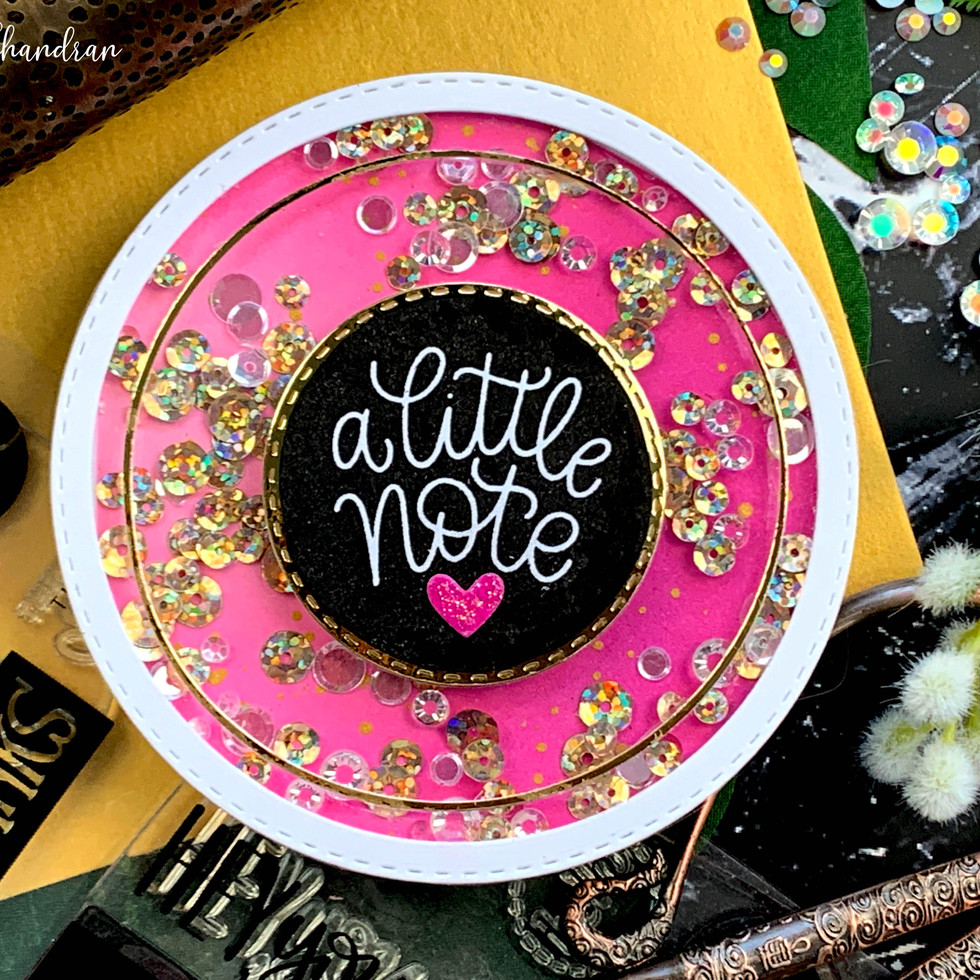
Card 2:
Start by blending Spun Sugar, Picked Raspberry and Seedless Preserve on a 4x4 Bristol smooth white cardstock. I blended this exactly the same way I did the first green panel. And add the gold splatter using Gold Watercolor paint. Die cut the blended panel using the largest of the SSS Stitched Circle Wafer Dies.
Crate a white frame using the largest and the second largest Wafer die and adhere a sheet of Acetate behind this frame. I also created a thin circle with Gold Mirror cardsotck. For the thin circle I first die cut the frame exactly how I did the white frame and then I took a slightly smaller circle die, I used a very old Spellbinders Nested circle die. I placed this die in the center of the gold circle frame and die cut it to create a thin circle. (I hope this is making sense). I adhered this thin gold circle on the acetate using liquid glue.
Stamp the sentiment A Little Note on white cardstock with black ink and fussy cut it with scissors very close to the edge of the black circle. Die cut another circle slightly bigger then the sentiment circle on mirror gold card stock using SSS Stitched Circles Wafer Die. Glue them together using foam adhesive.
To make the shaker card, add a thin foam adhesive to the back of the white frame and adhere it tot he pink blended panel. Make sure to lay the shaker filling on the pink panel before adhering the white frame on it. Add the round sentiment to the center of the acetate window of the shaker panel.
To make a round card- Start with a 41/4x4/14 square top folding note card in white. Die cut the largest circle with a slight over hang of the die on the folded edge of the notecard and run it to through the die cutting machine. this will make a top folding round card.
Adhere the shaker panel to the front of the round white notecard and you are done .
These cards were so easy to make and they do pack a whole lot of punch to them. Please let me know if you have any questions on how I made this card. Thank you for visiting and spending your time with me. See you next time until then keep sharing handmade kindness and love.
"Kindness is a vast color that only your heart knows how to paint".

I am listing all the products I have used to make this card project below. You can click on any image below to directly go to any of the coordinating stores for purchasing these products.The products listed below are not an affiliate link which means I don't get paid for it. This is so that it makes it easy for you to find everything in one place.


Comments